How to Add Audio to MKV Files With Online & Offline Tools
In our modern days, adding audio to MKV files is a common task to enhance or customize video content. Some users might want a different background score or an edited audio track, which can be easily included as an additional audio option in the MKV file. Fortunately, MKV allows you to insert various audio formats while keeping the original video intact. In today’s post, we will explore various methods to add audio to MKV. This way, you can sync, edit, and adjust audio to fit the video seamlessly. So, without any further discussion, let’s get started!

Part 1. What are the Commonly Used Audio Codec Supported by MKV
Before we get into the process of adding audio to MKV, it is important to first understand the MKV’s supported audio codec. Known by many as MKV, the Matroska Video format is highly recognized due to its extensive support for various audio codecs. Some of the commonly used audio codecs compatible with MKV include AAC, MP3, AC3, FLAC, and DTS.
MKV’s support for multiple audio tracks is another advantage. It allows you to include various language tracks, commentary, or different versions of audio in a single file. This multi-track capability is beneficial for international content distribution. This enables viewers to switch between languages or additional audio options without needing separate files.
Part 2. How to Add Audio to MKV Files in 4Videosoft Video Converter Ultimate
4Videosoft Video Converter Ultimate is an all-in-one multimedia software that goes beyond its primary function. Its name may not reveal it, but it can help you add audio to MKV file. This adaptable software offers an MV Maker known by many as a Music Video Maker. This added feature can be used to incorporate your most-liked music as your MKV’s background audio. Best of all, you can adjust the audio’s volume and delay to improve the quality and synchronization of the sound in your project.
Beyond adding audio, it also boasts essential tools for editing your MKV files. 4Videosoft Video Converter Ultimate offers an easy-to-navigate video editor that is worth exploring. These tools can be used to correct the video’s orientation, add filters, adjust basic effects, and overlay a custom watermark. Plus, it offers numerous creative and unique templates to enhance the overall impact of the video. Sounds great? Well, it is just a few to name all the features and tools offered by 4Videosoft Video Converter Ultimate.
What to Expect With 4Videosoft Video Converter Ultimate:
• Produces high-quality video outputs with up to 4K/5K/8K resolution.
• Allows adjusting the volume level, delays, and supports fade in/out.
• Handles more than 1,000 input and output formats, including MKV files.
• Supports uploading audio tracks in any format as your background music.
Here’s how to add audio to MKV file using 4Videosoft Video Converter Ultimate:
Step 1Start by getting the free download of 4Videosoft Video Converter Ultimate. Install the all-in-one multimedia software and allow the installation process to finish.
Step 2After completing the installation, launch 4Videosoft Video Converter Ultimate on your computer right away. Afterward, proceed to the Music Video Maker by clicking the MV tab.
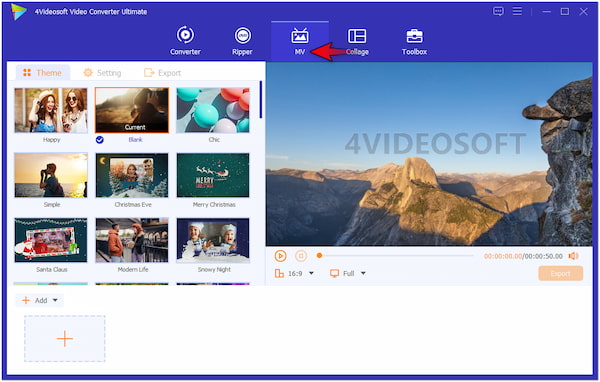
Step 3In the MV window, click the + Add and select Add files to import the MKV files. If your source videos are compiled in a single folder, select the Add Folder option.
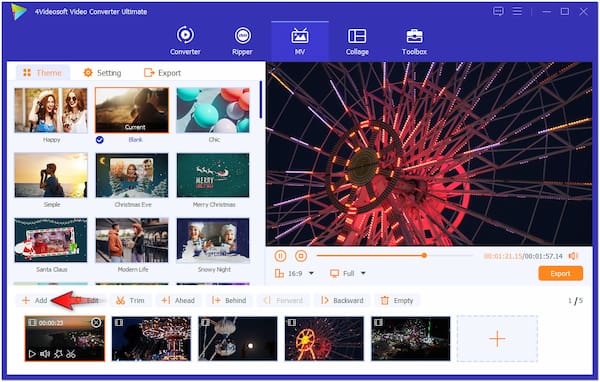
Step 4If needed, click the Edit button to access the software’s video editor. Within the video editor, you will be able to perform basic editing and enhancements, including:
Rotate & Crop: This section allows you to rotate the orientation of your video. Also, you can crop your video dimension to various ratios like 16:9, 1:1, 4:3, etc.
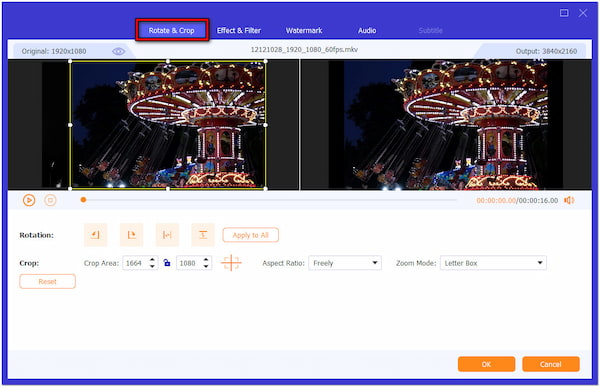
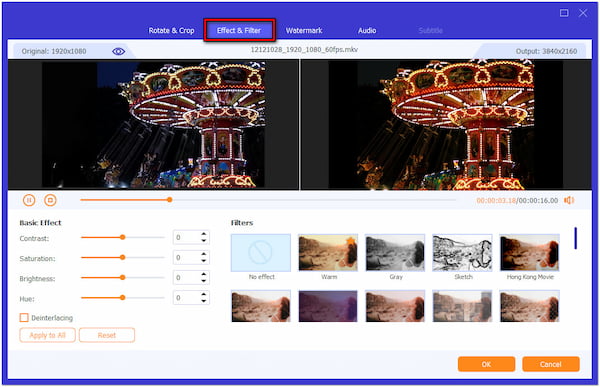
Effect & Filter: This section enables you to adjust basic video effects, such as brightness, contrast, hue, and saturation. Additionally, you can also find various unique filters here.
Watermark: This section lets you insert customizable text watermarks into your video. Besides text, you can upload a custom image or stickers and overlay it to your clip.
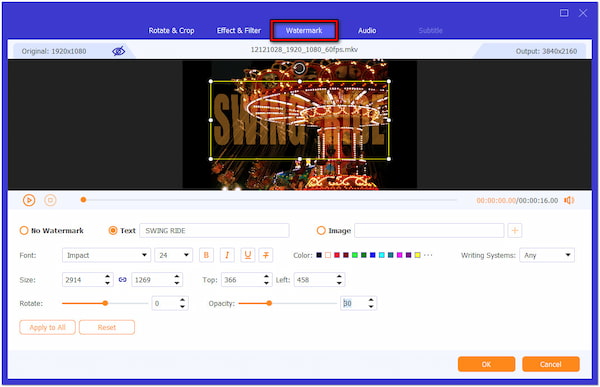
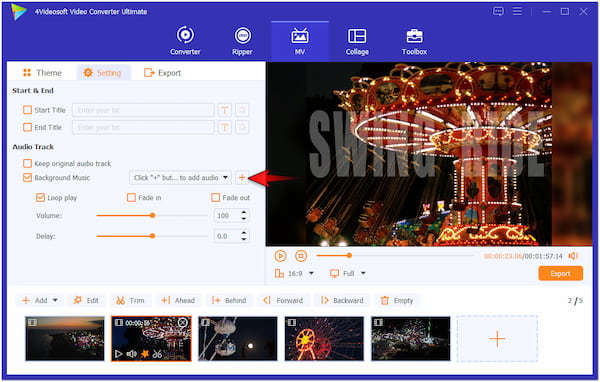
Step 5Once done with your editing, switch to the Settings tab and check Background Music. Click the + button to import your most-liked music to add it as your background audio.
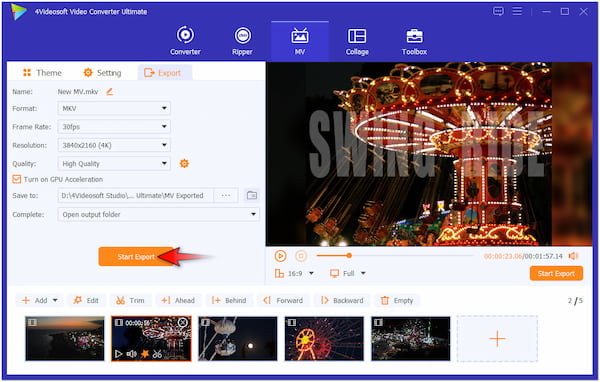
Step 6After completing the previous step, move on to the Export tab and set your output settings. Once everything is set, click the Start Export button to render the MKV.
Our Verdict:
Using 4Videosoft Video Converter Ultimate to add your most-liked audio to MKV is an effective solution. The software can handle high-quality audio formats and supports various audio codecs that perfectly fit your MKV files. In addition to incorporating audio, it provides essential tools that can be used to enhance your videos.
Part 3. How to Add Audio to MKV Files in Shotcut
Shotcut is a highly popular free and open-source video and audio editing software. It is available for download across operating systems, such as Windows, Mac, Linux, and FreeBSD. This software offers a multi-track editing and timeline-based interface, making it ideal to add or replace audio tracks in MKV files.
Here’s how to add an audio track to MKV in Shotcut:
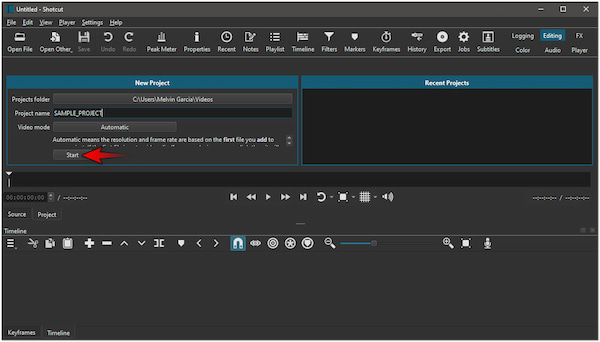
Step 1In the Shotcut opened, specify the project’s folder destination and set a name for your project. Afterward, continue by clicking the Start button to proceed to the editor.
Step 2Move to the upper left navigation pane and click Open File to import the MKV. Then, you will need to drag the MKV file into the timeline to set it as the primary video track.
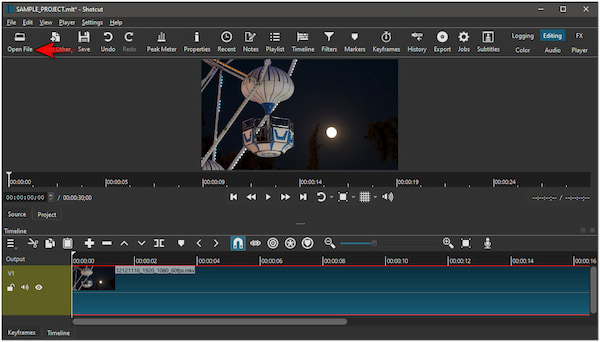
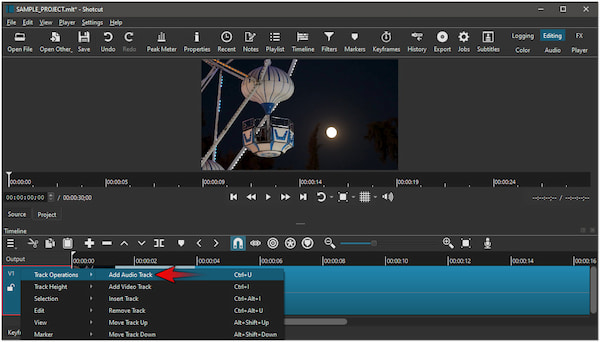
Step 3Click the Open File for the second time to add a new audio track. Right-click the V1 track on the timeline area, click the Track Operations, and select the Add Audio Track option.
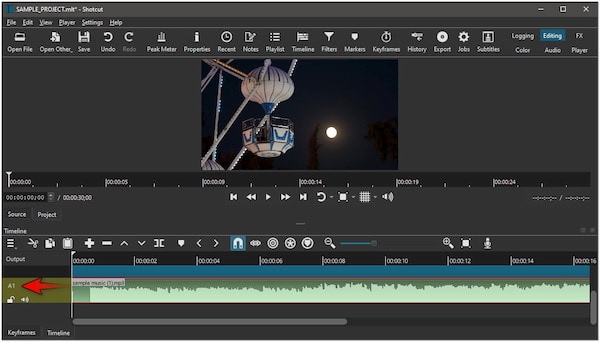
Step 4At this stage, drag the uploaded audio file into the A1 track in the timeline. If needed, align the start of the audio with the video track to ensure synchronization.
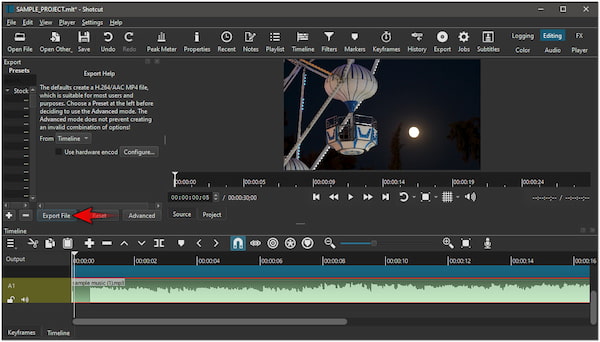
Step 5If you’re satisfied with the synchronization and volume levels, you can now save your project. Switch to the Export tab and click the Export File button to save it.
Our Verdict:
Shotcut is a practical choice for adding audio tracks to your MKV files. However, it can be complicated for non-professional users as it lacks automated features. Additionally, Shotcut will convert MKV to MP4 when you save your final project.
Part 4. How to Add Audio to MKV Files in WeVideo
WeVideo is a browser-based video editing solution that supports various file types, including MKV files. Compared to professional-grade software, it offers simple functionality for adding audio to videos directly online. You can upload MKV files, add audio tracks, and adjust them within the cloud interface in real-time.
Here’s how to add audio to MKV in WeVideo:
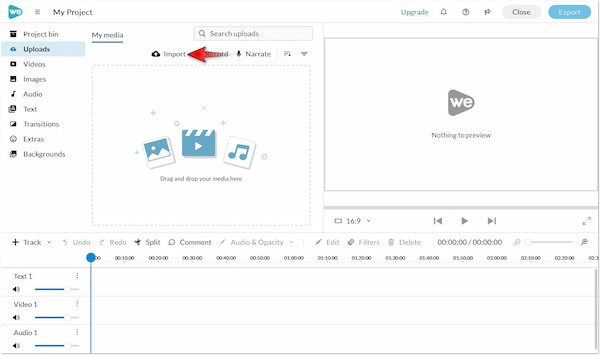
Step 1On the WeVideo homepage, click the Uploads section on the left navigation pane. Click Import to upload the MKV file and audio track into the media library.
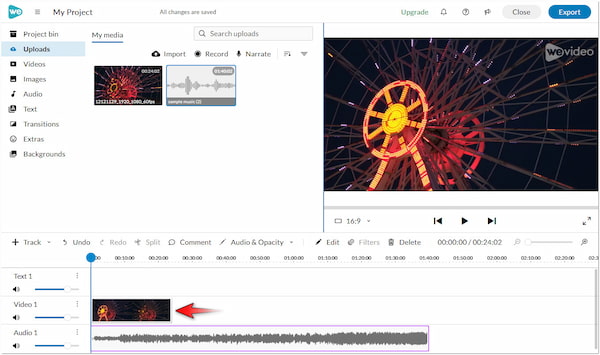
Step 2Following this step, you should drag the MKV file to Video 1 on the timeline. Then, drag the audio track from the media library to the Audio 1.
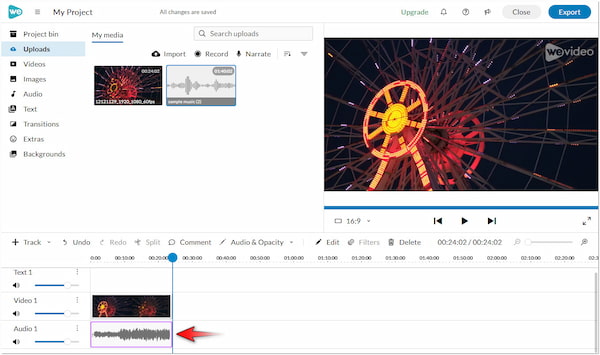
Step 3If needed, align the audio track with the start of the MKV video. Simply drag the edges of the audio track to trim it or adjust the duration.
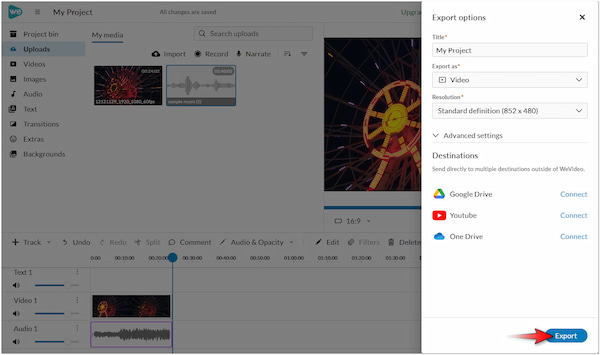
Step 4Once that is done, move on to the upper right navigation pane and click Export. In the export options, configure the settings according to your preference and click Export to save.
Our Verdict:
WeVideo is a convenient, user-friendly tool for adding audio to MKV files. Its interface is straightforward, making it ideal for quick edits and audio additions. In addition, it gives you the option to convert video to GIF in the export options. However, its free version can only output the project in SD quality with a watermark included.
Conclusion
Learning how to add audio to MKV offers both flexibility and enhanced personalization. This makes it an attractive option for those looking to customize their video files. If you need a quick solution to add audio to your video, WeVideo can be your go-to platform. It requires no installation, providing a fast and convenient process. Meanwhile, if you need detailed control over audio addition, Shotcut is a valuable option. It allows you to add multiple tracks in real time. However, if you prioritize simple processes with high-quality results, 4Videosoft Video Converter Ultimate is what you need. This all-in-one multimedia software enables you to upload your most-liked audio as your background music.


 5 Easy-to-Use MKV Editors (2025 Edition)
 Fix Windows 11 MKV Files Not Displaying Video Thumbnails
 Differences Between MKV vs MP4 vs WebM Explained


