

Troubleshooting to MKV Cannot Import to Premiere Pro

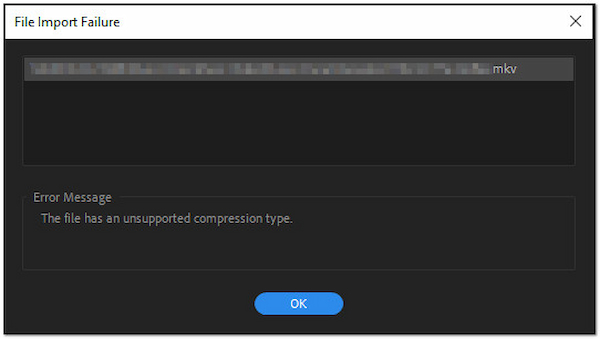
Have you ever experienced importing MKV files in Premiere Pro and an error message appeared? If yes, don’t stress. In Premiere Pro, uploading MKV can be a common challenge among video editors. Although these files are used for high-quality videos, their container structure can cause compatibility issues within the software. In today’s post, we will help you understand why you cannot import MKV to Premiere Pro. In the following sections, we will share the common reasons and potential solutions to troubleshoot the issue effectively.

Part 1. Common Reasons for MKV Import Issues in Premiere Pro
1.1 Codec Compatibility
Matroska Video File, known by many as MKV, is a multimedia container format. These files can hold unlimited data in a single file, including video, audio, subtitles, and images. Unfortunately, Adobe Premiere doesn’t support MKV files because it only supports certain codecs. Some of the supported codecs by Premiere Pro are Apple ProRes, H.264, MPEG-2, etc. If an MKV contains an unsupported codec, Premiere Pro will fail to recognize or import the file.
1.2 File Corruption

A corrupted file is another technical reason why you can’t import MKV in Adobe Premiere Pro. MKV are complex files, and even minimal damage to the file structure or metadata can prevent Premiere Pro from processing the file. Not to mention, MKV files can become corrupted in several ways. Options include during transfer between devices, incomplete downloads, or recording, which results in incomplete or damaged data.
1.3 Premiere Pro Version
The ability to add MKV to Premiere Pro heavily depends on the software version being used. Adobe only started incorporating support for the MKV container in more recent releases. Prior to Premiere Pro CC 2018 and 2019, it didn’t support MKV natively. It means any attempts to import MKV in the older versions would fail. It happens because it cannot decode the MKV container and its associated streams.
Part 2. Troubleshooting Steps
2.1 Check Codec Compatibility
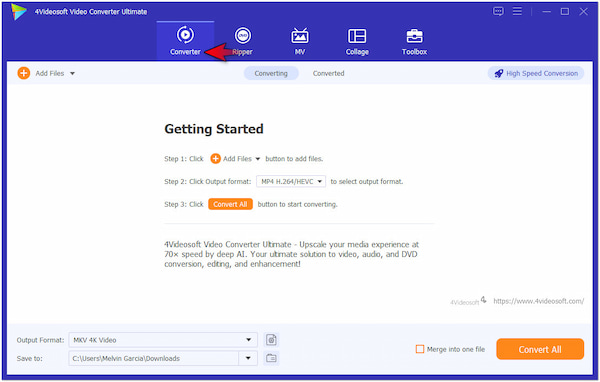
If the MKV contains codecs that aren’t compatible with Premiere Pro, converting it to a more supported format can resolve the issue. 4Videosoft Video Converter Ultimate is highly recommended so you can import MKV in Premiere Pro. This multi-format converter has a mind-blowing number of supported formats, reaching over a thousand. It lets you convert MKV in a different format using compatible codecs like H.264. Best of all, it supports simultaneous conversion, enabling you to process multiple files. In terms of processing speed, you don’t have to worry as it can convert files at 120× ultra-fast lossless conversion speed.
Here’s how to open MKV in Premiere Pro using 4Videosoft Video Converter Ultimate:
Step 1Start by getting a free download of 4Videosoft Video Converter Ultimate. Install the multi-format conversion software and allow the installation process to complete.
Step 2Once the installation is finished, launch the 4Videosoft Video Converter Ultimate on your computer. By default, you will be taken to the Converter tab automatically.
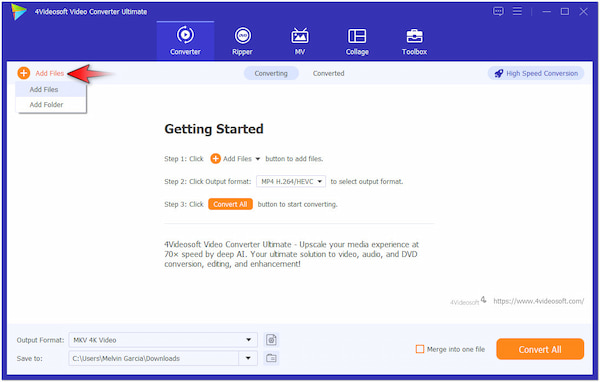
Step 3In the upper left navigation pane, click the +Add Files button to insert the MKV files. If your video files are compiled in a single folder, select the Add Folder from the dropdown menu.
Step 4Once the MKV files are loaded, locate the Output Format field at the bottom part. In the Video category, locate your preferred format and choose a preset with a compatible codec.
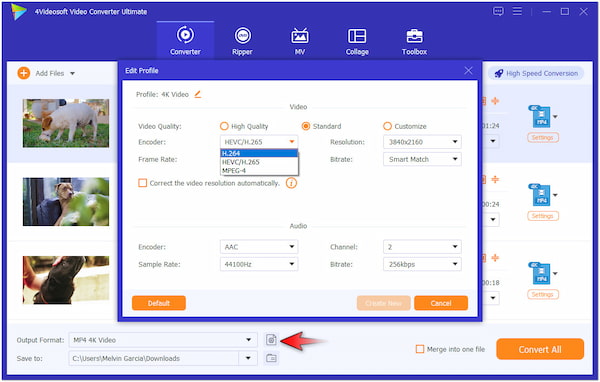
Step 5Following this step, move to the Output Format Settings to enhance the video quality further. Ensure the encoder is set to H.264 and change the resolution to 4096×2160.
Step 6Once that is done, switch to the High-Speed Conversion button and enable the 120× Faster Lossless Conversion option. Once set, click Convert All to begin the conversion.
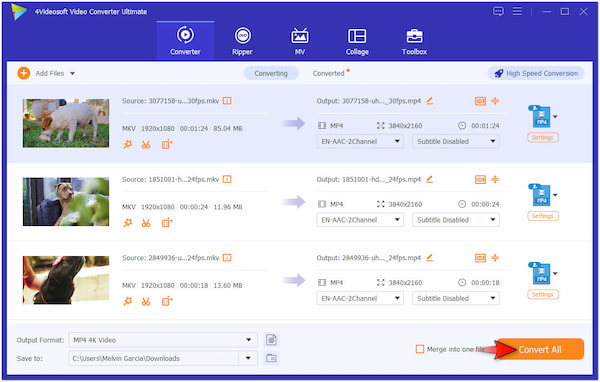
4Videosoft Video Converter Ultimate provides a convenient solution to convert MKV into formats that Premiere Pro handles easily. Additionally, it ensures the video quality is preserved even when working with multiple files. Aside from the MKV uploading issue, you might also want to check how to import WMV to iMovie on Mac.
2.2 Update Premiere Pro
Does Premiere support MKV? If you are using an older version of Premiere Pro, it’s essential to update the software. Not to mention, Adobe added MKV support in the 2018 and 2019 versions. The specific versions are Premiere Pro CC 2018 12.1-12.1.2 and Premiere Pro CC 2019 13.1.2. In simpler terms, using a version older than that will result in importing problems. Keeping the Premiere Pro updated ensures that you can take advantage of expanded format support.
Tip: If you don’t want to update the version of your Premiere Pro, there’s another workaround you can try. Playback the MKV file on a media player and use a 4K screen recorder. Afterward, capture the entire video and save it in a different file format.
2.3 Verify MKV File Integrity
Before taking any troubleshooting actions:
1. Ensure that your MKV file is not corrupted. If the file is corrupted, Premiere Pro will struggle or, at worst, fail to import it.
2. Use a media player and play the MKV file to check for signs of corruption. If there are issues like missing frames, stuttering, or playback failure, then it is corrupted.
3. In this case, consider using video repair software to mend any underlying corruption on your MKV file.
2.4 Try Alternative Video Editing Software
If you cannot import MKV to Premiere Pro for editing, trying an alternative software can be a viable solution. 4Videosoft Video Converter Ultimate is an excellent option for this purpose. This multifunctional software goes beyond converting media files, offering an MV Maker. This added feature comes with essential tools to perform video editing. It includes tools for cropping, rotating, adding filters, adjusting effects, and even adding custom watermarks.
Here’s how to use MKV in Premiere Pro alternative for editing:
Step 1At this stage, switch to the MV tab and click the +Add button. Select the MKV file from your local folder and load it to the software for editing.
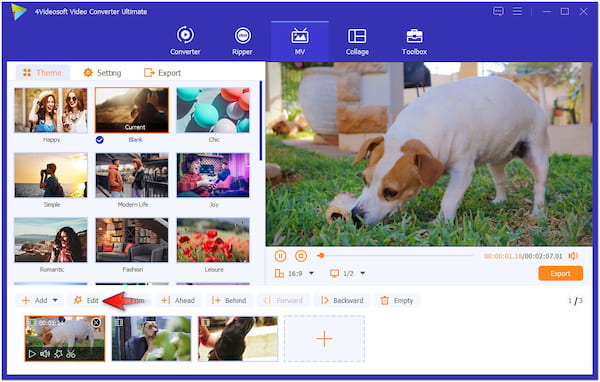
Step 2After importing the MKV files, click the Edit button to access the editing window. In the Rotate & Crop tab, correct the orientation of your video by rotating and cropping it.
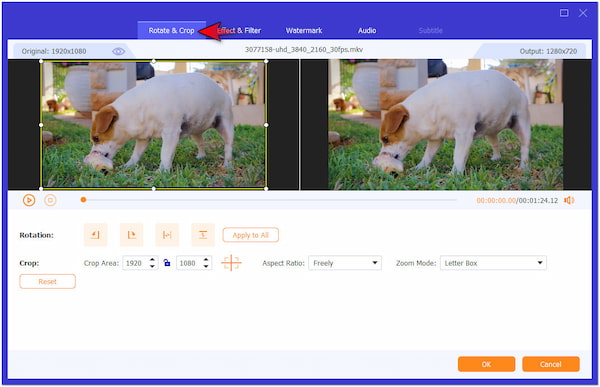
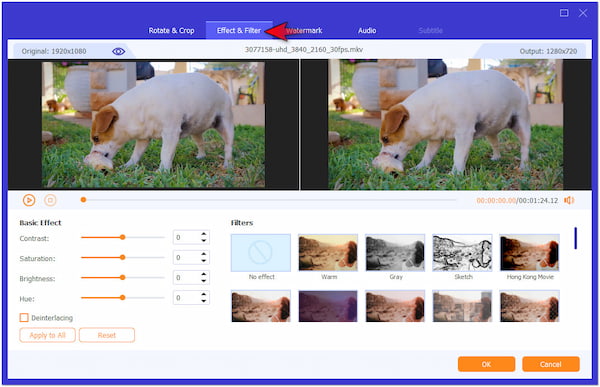
Step 3If you want to adjust basic effects like contrast, saturation, brightness, and hue, move to the Effect & Filter tab. You can also apply a filter by selecting one from the available options.
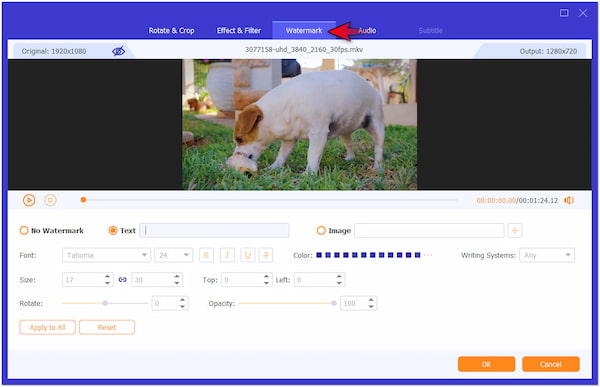
Step 4If needed, navigate to the Watermark tab to add a customizable text watermark. You can select your preferred font style, color, and size. Also, you can upload a custom image.
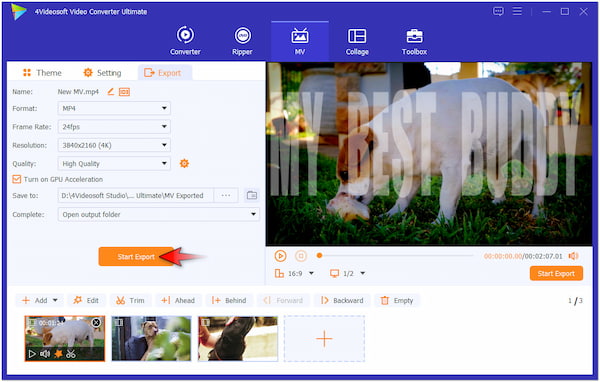
Step 5Once done with editing, proceed to the Export tab. Select MP4 as an output format, set other parameters, and click Start Export to save your final video.
4Videosoft Video Converter Ultimate is not just about converting MKV files. This versatile software can also be used to edit and enhance your videos without requiring expertise. If you want to access more, you can explore the Toolbox section, which boasts over 20+ editing tools.
Conclusion
If MKV files fail to import into Premiere Pro, it is due to several factors. This includes incompatible codecs, corrupted fMKV files, and outdated software versions. If you cannot import MKV to Premiere Pro, considering 4Videosoft Video Converter Ultimate can overcome these import challenges. This versatile software allows you to convert MKV files into a new format with a supported codec. Aside from that, it lets you use built-in editing tools to enhance your projects.
 How to Convert Video to Animated GIF on Any Device [Full Guide]
 How to Convert MKV Files to MOV Without Losing Quality
 How to Convert MP4 to WMV: Fast and Easy Ways in 2025


